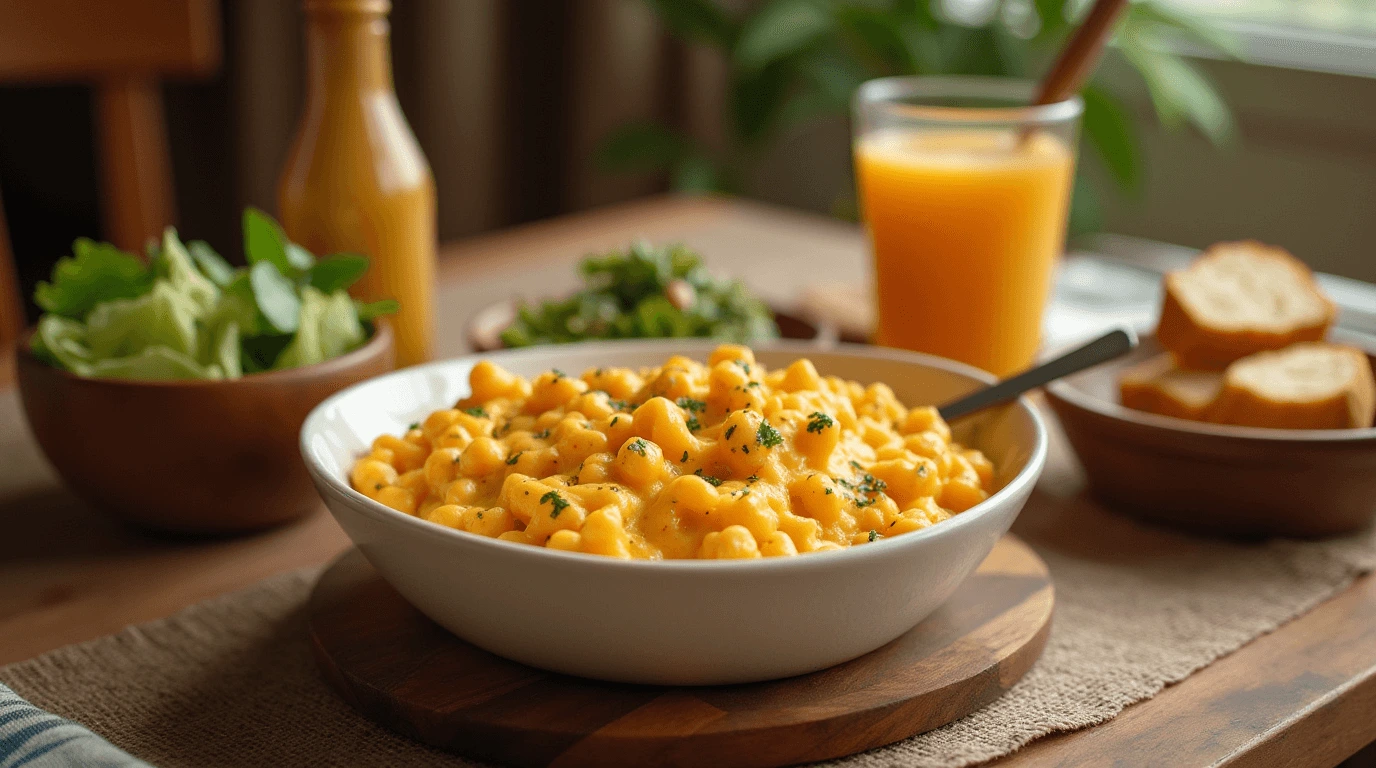
Who doesn’t love the creamy, cheesy comfort of mac and cheese? If you’ve ever tasted Chick-fil-A’s iconic mac and cheese, you know it’s a game-changer. With its rich blend of Cheddar, Parmesan, and Romano cheeses baked to golden perfection, it’s the ultimate side dish for any meal. But what if I told you that you can recreate this restaurant-style magic right in your kitchen?
This easy Chick Fil A mac and cheese recipe is perfect for weeknight dinners, potlucks, or when you’re simply craving some indulgent comfort food. Whether you’re making it for the family or impressing guests, this copycat recipe will have everyone coming back for seconds. Ready to bring this creamy delight to life? Let’s dive in!
Table of Contents
What Makes Chick Fil A Mac and Cheese Recipes So Special?
If you’ve ever indulged in a warm, creamy serving of Chick-fil-A’s mac and cheese, you know exactly what makes it so special. It’s not just the velvety cheese sauce or the perfectly baked top—it’s the balance of flavors and textures that make this dish a crowd-pleaser every time. Let’s break down why this mac and cheese stands out and how you can replicate that restaurant-style experience at home.
1. The Cheese Blend
The secret to Chick-fil-A’s mac and cheese is its blend of cheeses. A rich combination of cheddar, Parmesan, and Romano cheeses creates a sauce that’s both creamy and full of flavor. The cheddar adds that classic, sharp cheese flavor, while the Parmesan and Romano bring a savory depth that elevates the entire dish. When combined, they melt into the smooth, velvety sauce that makes every bite irresistible.
2. Creamy Texture
What truly sets this mac and cheese apart is the texture. It’s not too runny or too thick—it’s perfectly creamy. The key to achieving this balance is using both milk and heavy cream to make the sauce. The creaminess comes from the combination of these ingredients, which ensures that the sauce clings to the pasta without feeling heavy. It’s a consistency that feels luxurious but is simple to achieve.
3. Golden, Baked Top
Another hallmark of Chick-fil-A’s mac and cheese is the crispy, golden top. This step adds a little texture contrast to the creamy interior, giving the dish that perfect bite. The trick is to bake the mac and cheese for just the right amount of time—enough to get a golden crust but not too long that the sauce dries out. The baking step gives the dish an extra layer of flavor, as the cheese on top melts and crisps to perfection.
4. Restaurant-Quality at Home
One of the best things about this recipe is that you can enjoy that same restaurant-quality mac and cheese from the comfort of your kitchen. The combination of high-quality cheeses, simple ingredients, and a few easy steps makes it easy to replicate the iconic Chick-fil-A mac and cheese. Plus, you can make it in bulk, perfect for a family dinner or a gathering with friends.
By understanding what makes this mac and cheese so special, you’re already on your way to recreating it at home. Now that you know the key components, let’s get into the essential ingredients that make this dish come to life!
Must-Have Ingredients for Chick Fil A Mac and Cheese
Here’s a detailed Chick-fil-A mac and cheese recipe that you can make right at home, bringing the rich, creamy goodness of the beloved fast-food dish to your kitchen. With this easy-to-follow recipe, you’ll have mac and cheese that rivals the original in flavor and texture.
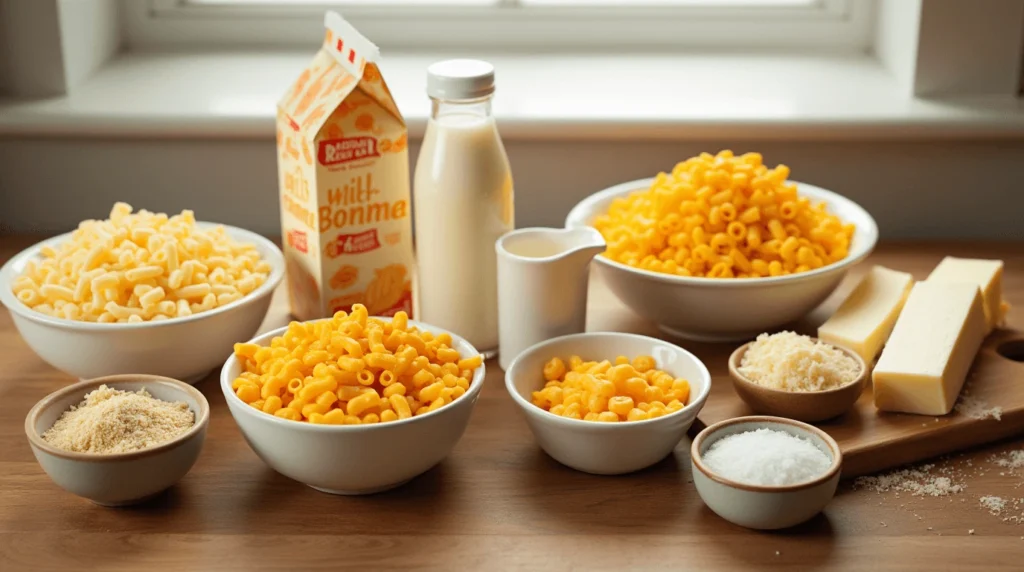
Ingredients:
- 8 oz elbow macaroni
- 1 ½ cups sharp cheddar cheese, shredded
- ½ cup Parmesan cheese, grated
- 1 cup whole milk
- ½ cup heavy cream
- 3 tbsp butter
- 2 tbsp all-purpose flour
- 1 tsp garlic powder
- 1 tsp onion powder
- Salt and pepper, to taste
- ½ cup panko breadcrumbs (optional for topping)
With these ingredients in your kitchen, you’re ready to make an amazing Chick-fil-A-inspired mac and cheese that’s sure to wow your family or guests! Let’s move on to the next step—getting it all together.
Step-by-Step Guide to Making Chick Fil A Mac and Cheese
Now that you have all your ingredients ready, it’s time to put everything together and create that perfect, creamy mac and cheese you’ve been dreaming of! Don’t worry, this recipe is simple to follow and packed with tips to make sure you get that smooth, golden dish every time.
1. Cook the Pasta
Start by boiling your elbow macaroni in a large pot of salted water. Make sure to cook it just until it’s al dente—slightly firm to the bite. This is crucial because you don’t want the pasta to become mushy once it’s baked. After draining the pasta, set it aside and move on to making the cheese sauce.
2. Prepare the Cheese Sauce
In a large saucepan, melt butter over medium heat. Once the butter is melted, slowly add in the heavy cream and milk, whisking constantly to combine. This will create the smooth base for your cheese sauce.
- Gradually stir in your cheddar, Parmesan, and Romano cheeses, a little at a time. Keep stirring until the cheese melts fully, creating a velvety, creamy sauce.
- Don’t forget to season with a pinch of salt, garlic powder, and a dash of black pepper. Taste as you go to make sure it’s perfectly seasoned.
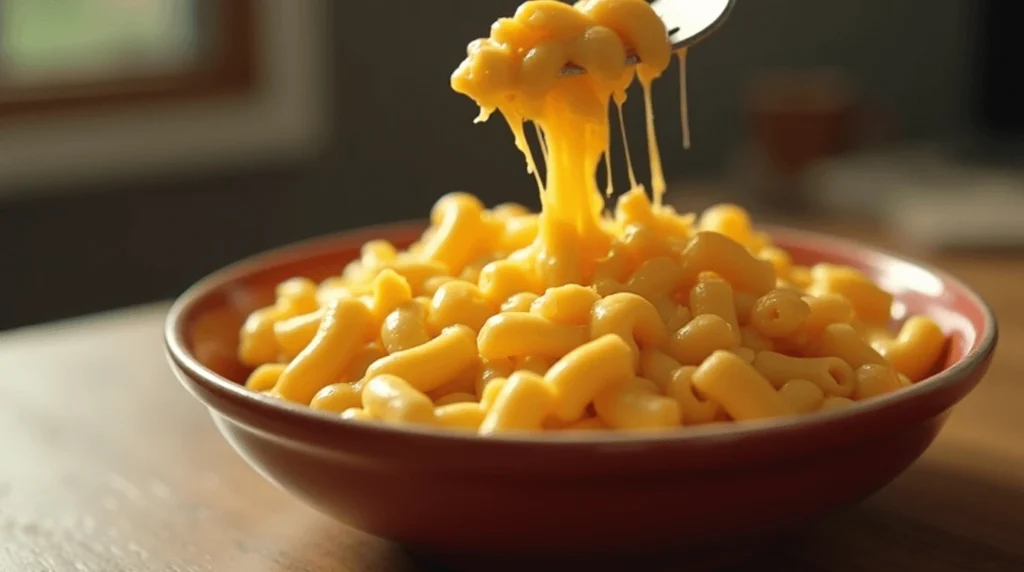
3. Combine Pasta and Sauce
Once the cheese sauce is nice and smooth, add the cooked pasta to the saucepan. Stir everything together until the pasta is evenly coated with the rich, creamy cheese sauce. You should see each elbow of pasta lovingly wrapped in that cheesy goodness.
4. Bake for a Golden Top
Transfer the mac and cheese to a greased baking dish and smooth it out with a spatula. Here’s where the magic happens: to get that signature golden, crispy top, pop the dish into the oven at 350°F (175°C) for about 20 minutes.
- If you like a bit of extra crunch, sprinkle some breadcrumbs on top before baking. Then, for an added crispy finish, broil the mac and cheese for the last 2-3 minutes. Keep a close eye on it so it doesn’t burn!
Once it’s out of the oven, let it rest for a few minutes before serving. The creamy, cheesy interior and golden top will make this dish hard to resist!
Tips for Perfection:
- Fresh cheese: For the best melt and texture, always use freshly shredded cheese. Pre-shredded cheese often contains anti-caking agents that can prevent it from melting smoothly.
- Pasta cooking: Remember, undercook your pasta slightly since it will continue cooking in the oven. This ensures the perfect texture!
- Make ahead: You can prepare the mac and cheese up to the baking step and refrigerate it. When you’re ready, just bake it as usual.
Now you’ve got the secret to making a delicious Chick-fil-A-inspired mac and cheese at home! Just follow these steps and you’ll have a dish that’s creamy, comforting, and sure to be a hit with family and friends. Enjoy!
Pro Tips and Variations
Now that you’ve got your base recipe down, let’s take your mac and cheese to the next level with some pro tips and creative variations. Whether you’re looking to adjust the flavor, add a twist, or make this dish even more special, I’ve got you covered.
1. Add Protein for a Hearty Meal
If you’re looking to turn this mac and cheese into a more filling meal, consider adding a protein.
- Grilled chicken: Thinly sliced grilled chicken breast pairs perfectly with the creamy mac and cheese.
- Bacon: For a savory, crispy addition, crumble up some bacon and sprinkle it over the top before baking. The smoky flavor will balance beautifully with the cheese sauce.
- Ground beef or sausage: These can add a meaty richness that pairs well with the creaminess of the cheese.
2. Mix in Vegetables for Extra Flavor
Mac and cheese is a versatile dish, so feel free to sneak in some veggies for added flavor and nutrition.
- Broccoli: Lightly steamed broccoli florets blend wonderfully with the cheese and provide a slight crunch.
- Spinach: Sautéed spinach adds a burst of color and a mild earthiness that complements the richness of the cheese.
- Tomatoes: Fresh or sun-dried tomatoes add a touch of acidity, brightening up the dish.
3. Switch Up the Cheeses for New Flavors
While the classic cheddar-Parmesan-Romano blend is iconic, you can always play around with different cheeses to change the flavor profile.
- Gouda: For a smoky twist, substitute some of the cheddar with smoked Gouda.
- Fontina: This cheese melts beautifully and gives a rich, nutty flavor that enhances the overall sauce.
- Mozzarella: If you love stretchy, melty cheese, mozzarella will add a creamy, gooey texture.
4. Add a Spice Kick
If you like a little heat in your mac and cheese, there are plenty of ways to spice things up.
- Cayenne pepper: A pinch of cayenne pepper will give your mac and cheese a subtle, warming heat.
- Jalapeños: Finely chopped fresh jalapeños bring both heat and flavor, especially if you’re adding bacon or sausage for extra depth.
- Hot sauce: A few dashes of your favorite hot sauce can add a tangy, spicy kick to the dish.
5. Make it Gluten-Free
If you’re following a gluten-free diet, you can still enjoy mac and cheese! Simply substitute the elbow macaroni with gluten-free pasta. Look for pasta made from rice flour, corn, or quinoa for the best texture. Make sure to check all your seasonings and cheeses for any hidden gluten ingredients.
6. Make Ahead and Freeze
One of the great things about mac and cheese is that it can be made ahead and frozen for later. If you want to prep this dish for a busy weeknight, prepare the mac and cheese up until the baking step. Let it cool, then wrap it tightly and store it in the freezer for up to 3 months. When you’re ready to bake, simply thaw it overnight in the fridge and then bake as usual for a quick and easy dinner.
These pro tips and variations are just the beginning—feel free to experiment and make this Chick-fil-A-inspired mac and cheese your own. With these adjustments, you can elevate the dish and make it even more delicious!
Serving Suggestions
Once your Chick-fil-A-inspired mac and cheese is baked to perfection, it’s time to serve it up! This creamy, cheesy dish is versatile enough to complement a wide variety of meals. Here are some tasty ideas to help you enjoy it to the fullest.
1. Serve as a Side Dish
Mac and cheese is the perfect side dish to accompany just about any main course. Here are some ideas:
- Grilled chicken: The juicy, smoky flavor of grilled chicken pairs wonderfully with the rich, creamy mac and cheese.
- Fried chicken: A Southern classic! The crispy, savory fried chicken contrasts beautifully with the creamy mac and cheese.
- BBQ ribs: The smoky, tangy flavor of BBQ ribs works perfectly with the comfort of mac and cheese, balancing the richness of both dishes.
2. Make it the Main Event
Sometimes, mac and cheese deserves to be the star of the show! Here’s how to make it a satisfying main dish:
- Top with protein: Add grilled shrimp, bacon, or even pulled pork on top for a heartier meal that’s still packed with flavor.
- Serve with a salad: A light, crisp green salad or coleslaw can cut through the richness of the mac and cheese and provide a refreshing balance.
3. Garnish for Extra Flavor
Garnishing your mac and cheese not only enhances its visual appeal but also adds a burst of extra flavor. Here are some great garnish ideas:
- Chopped parsley: Fresh parsley adds a pop of green and a light, herby flavor that pairs perfectly with the cheese.
- Crispy breadcrumbs: For added texture, sprinkle some toasted breadcrumbs on top before baking or as a final garnish after baking.
- Crispy fried onions: These add a savory crunch and a little extra flavor to your mac and cheese.
4. Perfect Pairings for Drinks
To wash down that creamy mac and cheese, consider serving these drinks:
- Iced tea: A chilled glass of unsweetened iced tea or sweet tea is a classic pairing with Southern-inspired dishes like mac and cheese.
- Lemonade: A refreshing glass of lemonade helps balance the richness and adds a bit of tang.
- Beer: A light lager or pale ale works well with mac and cheese, offering a nice contrast to the creamy texture.
5. Reheat and Serve Later
Mac and cheese is often even better the next day! If you have leftovers, here’s how to reheat them for maximum flavor and creaminess:
- Oven: Preheat your oven to 350°F (175°C), cover the mac and cheese with foil, and bake for 15-20 minutes until heated through.
- Stovetop: If you prefer stovetop reheating, warm it in a skillet over low heat, adding a splash of milk or cream to bring back its creamy consistency.
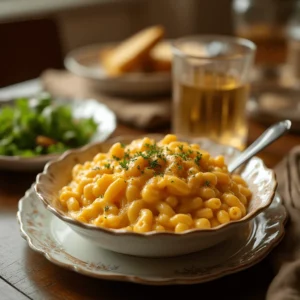
With these serving suggestions, you can turn your homemade Chick-fil-A-inspired mac and cheese into a crowd-pleaser for any occasion. Whether you’re serving it as a side dish or making it the star of the meal, it’s sure to be a hit!
Conclusion
And there you have it! Your very own Chick-fil-A-inspired mac and cheese that’s creamy, cheesy, and absolutely irresistible. Whether you’re serving it as a side dish, making it the main event, or adding your own personal twist, this recipe is sure to become a family favorite.
By following these simple steps, you’ll create a comforting dish with a rich, velvety sauce that rivals the original, all from the comfort of your own kitchen. With just a few easy-to-find ingredients and a bit of time, you can enjoy a creamy, cheesy masterpiece that everyone will love.
Remember, the beauty of mac and cheese is its versatility. Don’t be afraid to get creative with your ingredients, add proteins, mix in veggies, or change up the cheeses to suit your taste. You’re the chef—make this dish your own!
Thank you for trying out this easy Chick-fil-A mac and cheese recipe. I hope it brings as much joy to your table as it does to mine! Enjoy every bite!
chick fil a mac and cheese recipe
Ingredients
- 8 oz elbow macaroni
- 1 ½ cups sharp cheddar cheese shredded
- ½ cup Parmesan cheese grated
- 1 cup whole milk
- ½ cup heavy cream
- 3 tbsp butter
- 2 tbsp all-purpose flour
- 1 tsp garlic powder
- 1 tsp onion powder
- Salt and pepper to taste
- ½ cup panko breadcrumbs optional for topping
Instructions
Cook the Pasta
- Start by boiling your elbow macaroni in a large pot of salted water. Make sure to cook it just until it’s al dente—slightly firm to the bite. This is crucial because you don’t want the pasta to become mushy once it’s baked. After draining the pasta, set it aside and move on to making the cheese sauce.
Prepare the Cheese Sauce
- In a large saucepan, melt butter over medium heat. Once the butter is melted, slowly add in the heavy cream and milk, whisking constantly to combine. This will create the smooth base for your cheese sauce.
- Gradually stir in your cheddar, Parmesan, and Romano cheeses, a little at a time. Keep stirring until the cheese melts fully, creating a velvety, creamy sauce.
- Don’t forget to season with a pinch of salt, garlic powder, and a dash of black pepper. Taste as you go to make sure it’s perfectly seasoned.
Combine Pasta and Sauce
- Once the cheese sauce is nice and smooth, add the cooked pasta to the saucepan. Stir everything together until the pasta is evenly coated with the rich, creamy cheese sauce. You should see each elbow of pasta lovingly wrapped in that cheesy goodness.
Bake for a Golden Top
- Transfer the mac and cheese to a greased baking dish and smooth it out with a spatula. Here’s where the magic happens: to get that signature golden, crispy top, pop the dish into the oven at 350°F (175°C) for about 20 minutes.
- If you like a bit of extra crunch, sprinkle some breadcrumbs on top before baking. Then, for an added crispy finish, broil the mac and cheese for the last 2-3 minutes. Keep a close eye on it so it doesn’t burn!
- Once it’s out of the oven, let it rest for a few minutes before serving. The creamy, cheesy interior and golden top will make this dish hard to resist!
Tips for Perfection:
- Fresh cheese: For the best melt and texture, always use freshly shredded cheese. Pre-shredded cheese often contains anti-caking agents that can prevent it from melting smoothly.
- Pasta cooking: Remember, undercook your pasta slightly since it will continue cooking in the oven. This ensures the perfect texture!
- Make ahead: You can prepare the mac and cheese up to the baking step and refrigerate it. When you’re ready, just bake it as usual.
Notes
FAQs
I know you might have a few questions about making the Chick-fil-A-inspired mac and cheese recipe, so let’s tackle some of the most common ones to ensure your cooking experience is as smooth as the cheese sauce!
Can I make this mac and cheese ahead of time?
Absolutely! You can prepare this mac and cheese up to the point of baking. Once it’s mixed together, cover it tightly and refrigerate for up to 24 hours. When you’re ready to bake, just pop it in the oven, and you’re good to go! It also freezes well, so you can store leftovers or make extra for a future meal.
Can I use different types of cheese?
Yes! The beauty of mac and cheese is its versatility. While cheddar, Parmesan, and Romano create that classic flavor, you can swap in other cheeses like Gruyère, Fontina, or smoked Gouda for a new twist. Just remember to choose cheeses that melt well for the creamiest texture.
How do I get the mac and cheese to be extra creamy?
For a super creamy mac and cheese, it’s all about using high-fat ingredients like heavy cream and whole milk. Also, be sure to shred your cheese yourself—pre-shredded cheese often contains anti-caking agents that can affect the texture.
Can I make this recipe gluten-free?
Yes, you can easily make this dish gluten-free by swapping the elbow macaroni with your favorite gluten-free pasta. There are many great gluten-free options available, such as rice pasta or quinoa pasta, that will work just as well!
How do I keep the mac and cheese from drying out?
To avoid drying out, be sure to bake it just until the top is golden and crispy, then remove it from the oven. If you’re reheating leftovers, add a little splash of milk or cream to bring back the creaminess before warming it up.
Can I add veggies to the mac and cheese?
Absolutely! Veggies like broccoli, spinach, or even tomatoes can be mixed in for added nutrition and flavor. You can steam or sauté them first to enhance their texture and flavor before adding them to the pasta and cheese sauce.
How do I get the perfect crispy top?
For that signature crispy top, be sure to bake the mac and cheese at a moderate temperature (350°F/175°C) for about 20 minutes. If you like it extra crispy, pop it under the broiler for the last 2-3 minutes, but keep an eye on it to prevent burning.
These answers should help you feel confident and ready to make the perfect Chick-fil-A mac and cheese every time. If you have more questions, feel free to leave them in the comments—I’d love to help! Happy cooking!
Leave a Reply
There are no reviews yet. Be the first one to write one.